Can you paint a leather couch? The answer is a resounding yes!
If you’ve ever stared at your worn-out leather couch and wondered if there’s a way to revive it, you’re not alone.
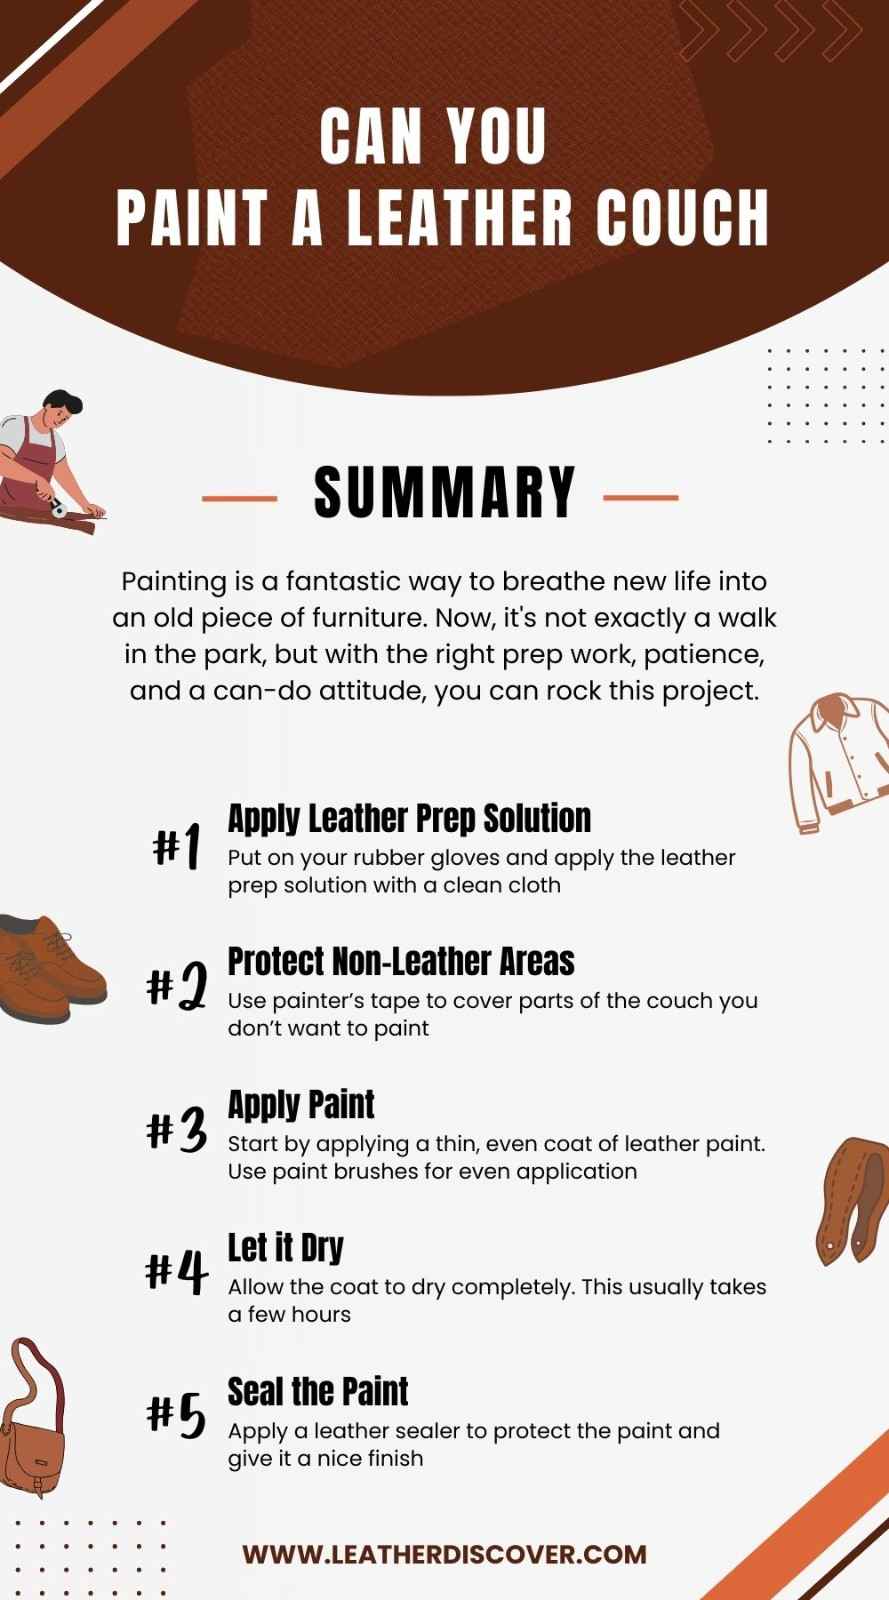
Here’s the thing: Painting is a fantastic way to breathe new life into an old piece of furniture.
When I first considered painting my leather couch, I had my doubts. Would the paint stick?
However, after researching and testing a few techniques, I discovered a world of possibilities for giving leather furniture a second chance.
In this article, we’ll explore everything you need to know about painting a leather couch.
From practical tips on preparation and choosing the right paint to avoiding common mistakes, this blog post will equip you with the know-how to tackle this project successfully.
Essential Considerations Before You Paint
Before you start the painting, here are a few essential considerations:
Not all leather is created equal, some don’t play well with paint. Generally, genuine, full-grain leather takes to paint the best.
Apply a small amount of the paint you plan to use on a tiny, inconspicuous area of the couch and let it dry completely. This way, you can see how the leather reacts to the paint and ensure it won’t crack, or peel.
Leather paint fumes can be strong. Ensure good ventilation by opening windows and doors while working. Wear a mask for added protection.
Both acrylic and water-based leather paints are popular. Acrylics offer a wider range of colors, perfect if you’re aiming for a bold statement piece. Water-based are more flexible and easier to clean up, making them ideal for beginners.
I went with acrylic leather paint for my chair, and it worked beautifully.
Prepping Your Leather Couch for Painting
Preparing your leather couch properly is essential to ensure the paint adheres well and the finish looks professional. Here’s how to ensure your leather is ready for its close-up:
Cleaning the Couch: Gently wipe down the entire couch surface, paying close attention to areas that get a lot of contact, like armrests and seat cushions.
Repairing Any Damage: Next, check your couch for any scratches, tears, or other damages. You can easily fix them with a leather repair kit.
Sanding the Leather: Lightly sand the entire surface of the couch. When I did this step, I was a bit nervous, but once I saw how well the paint adhered later on, I knew it was worth it.
Taping and Protecting: Finally, use painter’s tape to cover any areas you don’t want to paint, like wooden legs or metal accents.
Painting the Leather Couch in Steps
Here’s a step-by-step guide to painting your leather couch, ensuring it looks fabulous and lasts for years.
1. Gather Your Materials
Make sure you have everything you need before you start. Here’s a checklist:
- Mild soap and water
- Soft cloths or sponges
- Fine-grit sandpaper
- Painter’s tape
- Drop cloths or old sheets
- Rubber gloves
- High-quality leather paint
- Paintbrushes or sponges
- Leather sealer
2. Apply Leather Prep Solution
Put on your rubber gloves and apply the leather prep solution (deglazer) with a clean cloth. This removes the finish and ensures the paint adheres properly.
When I applied the deglazer, I noticed the leather looked slightly duller. This is exactly what you want as it means the finish is ready for painting.
3. Protect Non-Leather Areas
Use painter’s tape to cover parts of the couch you don’t want to paint. Lay down drop cloths or old sheets to protect your floor and furniture.
I used an old bed sheet to cover my garage floor and taped off the wooden legs of my chair. It made the cleanup much easier and kept the paint where it belonged.
4. Apply the First Coat of Paint
Start by applying a thin, even coat of leather paint. Use foam applicators or paint brushes for even application.
Apply thin coats, going in one direction. Let each coat dry completely before applying the next (usually 24 hours).
5. Let it Dry
Allow the first coat to dry completely. This usually takes a few hours, but check the instructions on your paint for specific drying times.
I once got impatient and applied the second coat too soon, it didn’t turn out as smooth as I’d hoped. Letting each coat dry fully is essential.
6. Apply Additional Coats
Depending on the color and type of leather, apply multiple coats. Repeat the painting and drying process until you achieve the desired coverage and color.
For my chair, it took three thin coats to get the rich, even color I wanted.
7. Seal the Paint
Once you’re satisfied with the color and the paint is fully dry, it’s time to seal it. Apply a leather sealer to protect the paint and give it a nice finish.
The sealer I used gave my chair a slight sheen and made it feel much more durable. It’s a step you don’t want to skip.
8. Let it Cure
Allow the painted and sealed couch to cure for at least 24 hours before using it. This will ensure the paint and sealer are fully set and durable.
9. Finishing Touches
Apply a leather finisher after the paint dries completely. This helps protect the paint and make the surface water-resistant.
10. Using Leather Spray Paint
Shake the spray paint can vigorously for a couple of minutes to mix the paint thoroughly. Hold the can about 6-8 inches away from the leather surface.
Apply the spray paint in light, even coats, using a sweeping motion to avoid drips and uneven coverage.
Source: Tanglewood Sue YT Channel
Pros and Cons of Painting a Leather Couch
Here’s a table outlining the pros and cons of painting a leather couch:
| Pros | Cons |
|---|---|
| Cost-Effective | Time-Consuming |
| Painting is generally cheaper than buying a new couch. | The process can take several days including drying time. |
| Customizable | Requires Skill and Patience |
| You can choose any color and finish to match your decor. | Achieving a smooth, even finish can be challenging. |
| Refreshes Old Furniture | Potential for Mistakes |
| Gives new life to an old, worn-out couch. | Mistakes can be difficult to correct once the paint is applied. |
| Environmentally Friendly | Durability Concerns |
| Reduces waste by refurbishing existing furniture. | If not done properly, the paint can crack or peel over time. |
| Personal Satisfaction | Limited Types of Leather |
| A rewarding DIY project that reflects your style. | Not all types of leather are suitable for painting. |
| Protection | Odors and Fumes |
| Sealing the paint can protect the leather from further wear. | Paint and prep solutions can have strong odors. |
Common Mistakes to Avoid When Painting Leather Couch
Here are some common mistakes to avoid when painting a leather couch:
Don’t use harsh chemicals or all-purpose cleaners. Stick to rubbing alcohol for degreasing the leather surface.
If your leather is very smooth, neglecting light sanding can lead to poor paint adhesion.
Regular household paint is a big no-no. Opt for specific leather paints like Angelus or Miss Lillian’s for optimal results.
Resist the urge to rush the process. Apply multiple thin coats for even coverage and to prevent cracking and peeling.
Let each coat dry completely before applying the next. This usually takes around 24 hours.
Source: Shy’s Designs YT Channel
Conclusion
So, can you paint a leather couch? Absolutely!
It’s a budget-friendly way to breathe new life into an old favorite.
Now, it’s not exactly a walk in the park, but with the right prep work, patience, and a can-do attitude, you can rock this project.
Remember, the key is to take your time, use the right products, and don’t be afraid to experiment on a hidden spot first.
Think of it this way: the worst that happens is you learn from the experience. But the best-case scenario? You’ve got a stunning, one-of-a-kind piece that reflects your unique style.
Resources Consulted

- What Is Caiman Leather? A Detailed Guide - July 25, 2024
- What Is Tumbled Leather?A Complete Guide - July 25, 2024
- What Is Kip Leather? Premium Leather Choice - July 24, 2024