You’re all set for a cozy evening on your favorite leather couch. But as you settle in, you notice a tear, a scratch, or a worn spot that’s hard to ignore.
It’s like a little heartbreak every time you see it, right?
Well, you’re not alone. We’ve all been there, staring at that damage, wondering if we need to replace the whole thing.
But here’s the good news: you don’t have to break the bank to buy a new couch. You can fix those minor tears and scratches yourself, and it’s easier than you think.
In this blog post, I’m going to share everything you need to know to patch up your leather couch.
We’ll go through the materials you need, and the step-by-step process to fix different types of damage.
Understanding the extent and type of damage is essential to ensure the repair is effective and lasts long. Let’s walk through this together.
1. Identify the Type
First, take a good look at the problem. Each type of damage requires a slightly different approach.
- Tears: Tears range from tiny dents to larger rips.
- Scratches: These can be superficial or deeper, caused by pet claws, keys, or everyday wear and tear.
- Scuffs: These are minor scratches, often leaving a lighter, discolored mark on the leather.
- Fading: Leather can lose its vibrancy over time due to sun exposure.
2. Determine the Severity
Note the size of the tear, the depth of the scratch, or the extent of the peeling. This evaluation will help you choose the appropriate patching method and materials needed.
3. Consider the Location
Is the damage on visible areas like the armrest or the seat cushion? Or is it tucked away where it’s less noticeable?
Understanding this will help you decide on the details needed for the patching process.
4. Assess the Leather Type
Feel the texture of the leather, is it smooth, textured, or suede-like? Knowing the leather type will guide you in selecting the most suitable patches and adhesives for repair.
Precautions Before You Patch
Before you jump into patching, here are a few precautions:
Always test any product on an inconspicuous area of the couch first, to make sure it doesn’t cause discoloration or damage.
Some leather cleaners and dyes can have strong fumes. Open some windows or work in a well-ventilated space to avoid inhaling them.
When applying leather filler, glue, or dye, it’s always better to start with a small amount and add more if needed.
Leather repair is all about precision and patience. Don’t rush through the process. I tried to fix a chair in five minutes. It didn’t end well.
If you have pets or young children, keep them out of the area while you’re working to prevent accidental bumps or spills. My curious cat once knocked over a bottle of adhesive
How to Patch a Leather Couch?
Here’s the step-by-step process of patching up your leather couch like a pro. Whether you’re dealing with a small scratch or a big tear, I’ve got you covered.
Gathering Necessary Supplies
Here’s a list of essential supplies:
- Scissors
- Sandpaper
- Leather Glue
- Sub-patch Material
- Leather Dye/Colorant
- Applicator Sponges or Brushes
- Soft Cloths
1. Patching Small Tears and Scratches
Small tears and scratches are common, especially if you have pets or kids. Here’s a step-by-step guide to fixing them:
Use a leather cleaner on a soft cloth to clean around the damage. I once skipped this step in a hurry and regretted it when the adhesive didn’t stick well.
Then, use scissors to trim loose threads around the tear for a stronger bond. Once the area is clean and prepped, apply a small amount of matching filler using an applicator tool.
Remember to let the filler dry completely according to the instructions before sanding it smooth with fine-grit sandpaper.
This will create a seamless transition with the surrounding leather, making your repair virtually invisible.
2. Patching Larger Tears & Holes
Larger tears require a more hands-on approach. Start by thoroughly cleaning the area with leather cleaner and let it dry completely.
Next, grab some scissors and sandpaper to trim any uneven edges and smooth the tear for better adhesion. I learned this the hard way when a patch came loose because I skipped sanding.
With a clean and prepped tear, choose a matching leather patch slightly larger than the hole and apply adhesive to the patch and the tear.
Place weights or heavy books on the patch to hold it in place while it dries. Leave it for several hours or overnight.
3. Patching Leather Couch Cushion
4. Finishing Touches
After all your cleaning and patching, grab a leather conditioner specifically formulated for your couch’s type.
Following the product’s instructions, apply a thin layer of conditioner with a soft cloth. For a touch of extra shine, gently buff the repaired area.
How to Care for and Maintain Your Leather Couch?
You’ve successfully patched up your leather couch and it’s looking fantastic. Now, let’s talk about how to keep it that way and avoid future wounds.
Just like us, leather doesn’t like extremes. Keep it away from direct sunlight and heat sources like radiators or fireplaces.
Leather might seem low-maintenance, but regular dusting is essential. I recommend using a soft, microfiber cloth to dust your couch weekly.
Regular conditioning keeps the leather supple and prevents it from drying out and cracking. I condition my couch every 3-6 months to maintain its luxurious appearance.
Accidents are inescapable. If you spill something on your leather couch, act quickly. Blot up any excess liquid with a clean, absorbent cloth.
Avoid harsh chemicals, as these can damage the leather’s finish. Also, discourage pets from using your couch as a scratching post.
For deep cleaning or stubborn stains, consider getting your leather couch professionally cleaned every 1-2 years.
Source: Phil Crockett YT Channel
Conclusion
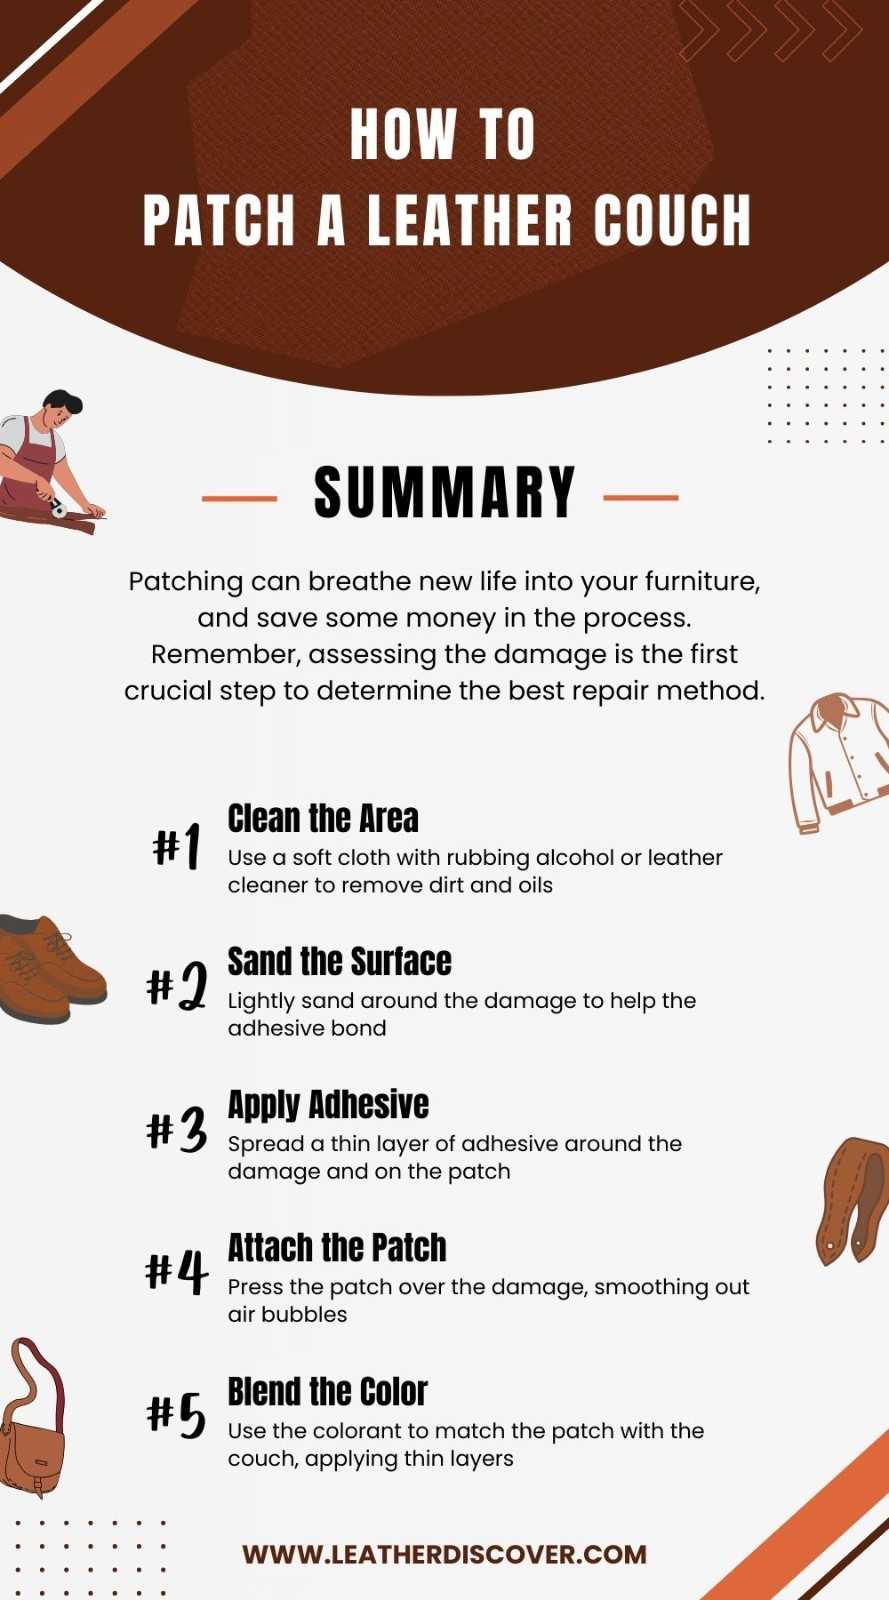
Wrapping up our journey on how to patch a leather couch, you’ve now got the skills and know-how to tackle those unexpected tears and scratches like a pro.
You can breathe new life into your furniture, and save some money in the process.
Remember, assessing the damage is the first crucial step to determine the best repair method.
Gathering your supplies beforehand makes the repair process smoother, and proper cleaning and preparation ensure a solid fix.
Don’t forget to enjoy the process and take pride in your work. After all, a well-loved leather couch tells a story of care and attention.
Resources Consulted

- What Is Caiman Leather? A Detailed Guide - July 25, 2024
- What Is Tumbled Leather?A Complete Guide - July 25, 2024
- What Is Kip Leather? Premium Leather Choice - July 24, 2024